Monday, 22 September 2014

Unit 02 Materials, Techniques and Processes

Using Pencils and different techniques
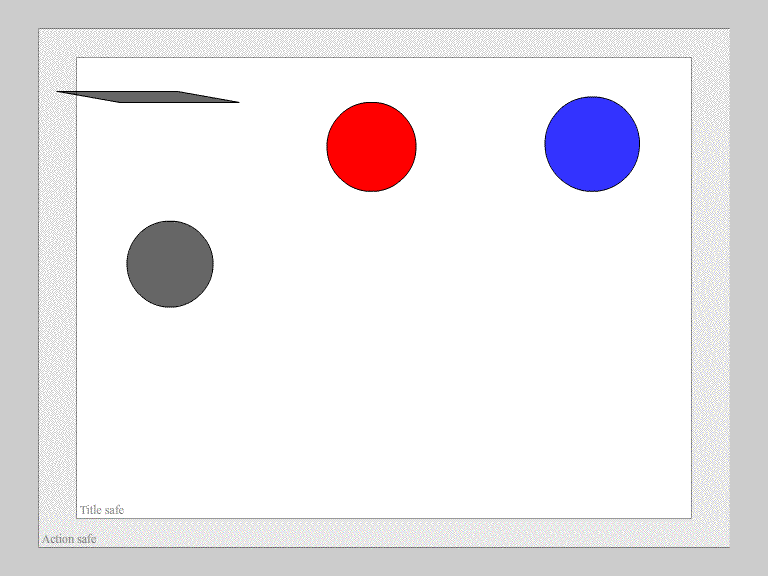
I was asked to create 2 of my own versions of the 7 different techniques. I had chosen to recreate depth and scale. To show depth I had tried to create a train track that had the illusion of it getting further away. To further show off the appearance of depth I could have made the train tracks become more narrow down the path. In a attempt to show scale I had made the cup have darker lines than the fork to show that the cap is closer to the eyes rather than the fork.

My attempt at Depth and scale techniques. 
Materials, Techniques and Processes Analysis sheet

Material/Technique/ Process Name: Pencil/seven basic pencil strokes/Research
http://static1.jetpens.com/images/a/000/052/52677.jpg
Variations or types i.e. 2B 2H pencil or shape/motion tweening
2B, 2H, HB
How do you use the material/ Step by step instructions for technique or process?
To use a pencil you would need to hold it in your hand and fingers to adjust it to your hand to feel more comfortable so that you have a grasp of the pencil and then you would put some pressure against the sharp end of a pencil to a piece of paper.
Relevant dimensions or constraints
Hexagonal Prism joined to a Hexagonal cone. The constraints to a pencil is the amount of work you can do with it's limited resource of graphite. It also has the constraints of your imagination and the skill of using a pencil.
Linked techniques
Pen, Colouring pencils.
Health and Safety issues related to Material, Technique or Process
Pencils have to be used responsibly by the users and not to be messed with other than their original purpose.
Evaluation (How you found exploring each Material, Technique or process)
I was asked to show my ability of the seven basic pencil strokes. I have found this quite hard to show at first, as I had no ideas in mind. Using my ability I believe that I have been able to convey 2 types of techniques. I had found that using a pencil for drawing is more effective than using a pen, as a pencil allows you to make mistakes and change them after.


Materials, Techniques and Processes Analysis sheet

Material/Technique/ Process Name : Pen/Hatching/Research
http://upload.wikimedia.org/wikipedia/commons/e/e1/03-BICcristal2008-03-26.jpg
Variations or types i.e. 2B 2H pencil or shape/motion tweening
Ball point, ink, gel, fineliners.
How do you use the material/ Step by step instructions for technique or process?
Hold the pen appropriately in you hand like you would with a pencil and then attempt to try different techniques like hatching, cross-hatching and dashes.
Relevant dimensions or constraints
Hexagonal Prism joined to a Hexagonal cone. The constraints to a pen would be reliability a pen could give and also that if you made a mistake with one then you would not be able to rub it out with a rubber.
Linked techniques
Pencil, stippling, wavy lines, scribbles.
Health and Safety issues related to Material, Technique or Process
Pens have to be used responsibly by the users and not to be messed with other than their original purpose.
Evaluation (How you found exploring each Material, Technique or process)
I had found using a pen quite different then usually using a pencil. This is because of the differences in view on paper and the effect it can give off to people who look at it. Hatching is a technique that I am not used to trying and I had found it a great experience to refresh my skills of art, whilst using a pen.

Pen techniques
After working on pencil techniques I had moved onto pen techniques and how pens can be useful to display a object in a different way. The worksheet was meant to test me of my skill using a pen and show me the type of techniques there are. I then had to attempt to cluster several objects together and draw the shadows using a pen. I had found this fairly simple to do with the blocks that I had chosen as the shadows were not too complicated to draw against the line of light.
My attempt to draw pen techniques. 
My attempt at using a pen to create shadows covering several images.

Paper Prototyping
Before creating a website it may be necessary to create a prototype using paper, as you can get a feel for how the website would work if it was created. In lesson I was told to create a prototype of a website for 'Poetry Slam'. This was to show me an understanding into how a website works when using hyperlinks and also the potential problems that may appear during the websites running. Potential problems may include; inability to return to home page, dead-end pages, broken hyperlinks, Text boxes not working and any problems that you may not originally thought would appear when someone would test the website.


Materials, Techniques and Processes Analysis sheet

Material/Technique/ Process Name : Paper/prototyping/ Paper prototyping
Variations or types i.e. 2B 2H pencil or shape/motion tweening
Virtual prototype
How do you use the material/ Step by step instructions for technique or process?
For someone to paper prototype a website, they must first get a piece of paper and change it to landscape. Then they can start to draw out how they believe the website to look. They could then use sticky notes to notify someone of hyperlinks that may appear on that website. The creator should have several of these that go to each link on the website, so when someone tries out a website, they can have a feel of what the website will feel like.
Relevant dimensions or constraints
An A4 or any chosen size to work upon. Constraints to this is that you wouldn't know how it works on the actual internet as it is just a test version. Making a paper prototype could also be time consuming.
Linked techniques

Health and Safety issues related to Material, Technique or Process
Paper Prototyping can be messy, but I do not believe that there are any serious hazards with paper prototyping.
Evaluation (How you found exploring each Material, Technique or process)
I had found paper prototyping an extremely useful tool into understanding how the end user will visit my prototype website. By understanding this, it will allow me to make my work overall better for the end user. Understanding processes like hyperlinking and making sure that they would work on the world wide web is a valuable tool to help you further on in the process.

Poetry Slam thumbnail website design
After creating the paper prototype, it was important to make sure to create several final designs, called thumbnail designs, to be able to compare and think about what ideas are best for a website.
My original designs for the Poetry Slam website design using thumbnails. This allowed me to look at several designs and compare them against each other.

I then narrowed it down to the best 4 that I believed to either work the best or would be visually appealing to the end user.

I chose this design for its simplistic, but interactive design that I believe would work the best for the target audience of teachers.

Materials, Techniques and Processes Analysis sheet

Material/Technique/ Process Name : Paper/Thumbnail Drawing/Planning
Variations or types i.e. 2B 2H pencil or shape/motion tweening
website thumbnails and interface thumbnails.
How do you use the material/ Step by step instructions for technique or process?
To create thumbnails for planing then you must get a piece of paper to draw your thumbnails on. For the images to be thumbnails, they need to be quick rough sketches of a small size. This will allow you to draw several thumbnails onto a single piece of paper.
Relevant dimensions or constraints
An A4 paper generally, possibly A3. The constraint to thumbnail drawing would be that you will not be able to see how the overall product will work until it is made.
Linked techniques
Interface thumbnails
Health and Safety issues related to Material, Technique or Process
No serious Health and safety problems could occur whilst working on this technique.
Evaluation (How you found exploring each Material, Technique or process)
After using this technique I have found out that they can be useful for creating several thumbnails and help towards having a final design overall that has been review and compared against other designs.


Seamless textures


I had to create and develop 3 Seamless textures in photoshop in order to practice my experience with the technique. The image above was my first test to attempt to create seamless textures. I had found this very hard to do, mainly because the tutorial for creating seamless images was out of date, using an older version of Photoshop. It was also hard to get it to work with the image as it would start to blur when I had attempted to create it. To create the seamless texture I had to change the offset of the image and then use the clone stamp tool in order to get a smoother texture than 2 straight lines overlapping the image.


How it looked before I edited it to be seamless.


Materials, Techniques and Processes Analysis sheet

Material/Technique/ Process Name: Building texture library/Seamless textures/Photoshop
Variations or types i.e. 2B 2H pencil or shape/motion tweening
Illustrator, fireworks and flash.
How do you use the material/ Step by step instructions for technique or process?
To create the texture using the technique, I had to; first find the image that I could use for a seamless texture, then I need to change the offset of the image so that it would overlay itself. Afterwards I would use the clone stamp tool in order to merge the edges together and make it seem like the same image.
Relevant dimensions or constraints
Constraints to using photoshop would be that the images you create require hard drive space, if there is no space left then you would not be able to save the image.
Linked techniques

Health and Safety issues related to Material, Technique or Process
Straining injuries could occur when using a computer so it is important to follow Health and safety guidelines.
Evaluation (How you found exploring each Material, Technique or process)
I had found using the technique extremely hard and still find it hard to create.

Wire framing
When I began creating my wireframe website I had to get a template from the 960GS website, on which I imported into photoshop.

This is my first design when creating wireframes.

I then made some changes  to the wireframe to make it more enjoyable for the user, using the CRAP (Contrast, Repetition, Alignment and proximity). Because of the 960GS Template, I had found it easier to create the website wireframe.

For me to make improvement in my wireframes I must need to create smart targets that will have me research into popular designs.


Techniques showreel

For my showreel I wanted to show my experience with different types of techniques and processes. I started off with practicing my ability to draw faces using a pencil. I had set my project to be two elves who are looking at each other. I had got this influence from 'The Elder Scrolls: Skyrim' after recently watching it. Using techniques that I have learnt, I should be able to achieve making it.
I had drawn my project using the techniques: Shading and line art. I had used shading to give off a feeling of texture to the hair in the image. This would give the viewer a bit of imagination into how I was trying to percieve it. I also used shading for the eye to make it look rounded, unfortunately for me to be able use this in Photoshop I need to remove all the shading and then make the outlines more darker for the scanner to pick up the image.
This is how it looked when all shading was removed and the image was ready to put into Photoshop.
I had then imported the drawn image into photoshop and began editing it.

I had then created a copy of the original, just incase I make a mistake then I would be allowed to go back to the original to start again. I then chose the magic wand tool to select the hair area on the left elf, but I had found one problem as there where holes in the lines from where the scanner did not pick them up, so I had to go over the image with the pen tool, which allowed me to continue on with my work. Afterwards I had deleted the inside area, so that it was an empty space. This allowed me to change the colour of hair to anything I had wanted.
Using the same magic wand technique I was able to cut out the face as well and begin applying colour to it. I had managed to find a skin texture and had overlayed the skin colour I had chosen. Afterwards I had started using different shades of the skin texture to show light and dark areas. I had picked a gem texture for the eyes, as I feel they will give off a shiny look.

I then did the same for the second elf in the photo, but this time had changed the skin texture from human skin to skin close to an elephants, as I wanted to give off the same effect as dark elf's within 'The Elder Scrolls: Skyrim'.

Using similar techniques and processes I had achieved to create a project in Unit 1 - Visual recording with my tutor James. Below is a video of the work I had been doing in Unit 1. For this work I had to create concept art for a story that I have created, which had started from mindmapping ideas following on, creating drafts, onto the final design, which in my opinion came out very well along with the research that I had done.


Tuesday, 9 September 2014

Unit 53 2D Animation Production


The earliest known animation predates backs to caveman era of humans where it is believed that art created by caveman tried drawing multiple sets of legs or different proportions from what animals would be, this was a way cavemen showed motion in their images. Although it is hard to find information on prehistoric animation because it has possibly been poorly preserved by men of those time, there have also been references of animation happening across the world like the Chinese dynasty era, Ancient Egypt and even Leonard da vinci as well. [The Art of Animation, Bob Thomas]
[http://www.dailymail.co.uk/sciencetech/article-2207596/A-night-pictures-caveman-style-Prehistoric-artists-used-cartoon-like-techniques-make-paintings-move.html]


Animation has always been an aspiration of humans and had become easily crafted as the Zoetrope was created in 1833, it is mentioned in Science and Civilization in china: volume 4 that something was created similar to that of the Zoetrope to display animation in 180AD. The Zoetrope was a device that required you to look through the eye slits as it spins round to give you the illusion that the images on the inside are actually moving.
[http://upload.wikimedia.org/wikipedia/commons/9/99/Zoetrope.jpg]


A thaumatrope was a animation method created in the 19th century, which used a circular plate with 2 different images on, 1 on each side. This method uses elastic bands to spin the plate at a fast speeds to give off the illusion of movement. A very well know thaumatrope is one with a cage in one side and a parrot on the other, which gives the illusion that the parrot is in the cage. [http://upload.wikimedia.org/wikipedia/commons/9/9f/Taumatropio_fiori_e_vaso%2C_1825.gif]


[http://upload.wikimedia.org/wikipedia/commons/4/40/Kinetophonebis1.jpg]
The Zoetrope’s successor, the Kinetoscope, which was made in 1888, became an early and extremely famous movie box, which displayed animation through the same illusion of a zoetrope except the images shown would be on a pieces of film and run at a pace that passed along the eye hole, which when watched would show the illusion of a moving images. The Kinetoscope used the same functions for showing films before video was created. I believe that this form of illusion of animation is much better than the zoetrope as it does not require anyone to move the object in order to see the animation, the only downside to this is that the Kinetoscope’s are big boxes that take up a lot of space compared to todays ways of storing animations on a DVD.


A flick book is a series of images that are drawn on a series of pieces of paper, which change slightly between each image and then the user has to switch between each image by holding one end of the paper and flicking between each individual piece at a certain speed to maintain the illusion of a moving image. An example of this can be found: (http://www.youtube.com/watch?v=7g9ykrhFVq8). The flick books are easier to carry and are portable unlike the zoetrope, due to it being made out of paper it can be made to any size.


Clay animation is where pictures are taken of a clay model that moves in each individual picture and when it is put together it creates an animation, which would show the clay animation moving by itself.  Stop-Motion animation is the most common type of animation, which is the heading group of Claymation, as it is used in films like ‘Chicken run’ and ‘Wallace and Gromit’, which heavily influence a lot of people. Stop-Motion animation has lots of individual genres inside of itself that go from clay animation to drawn animation.

[http://images2.fanpop.com/images/photos/4400000/Corpse-Bride-making-the-film-corpse-bride-4429691-450-305.jpg]
Stop-motion animation is a technique that allows the create to take several images of an object that moves in a direction, when all of the pictures are compiled into a movie, it gives of the illusion that the object is actually moving. Famous stop motion animations include 'The corpse bride' and 'The nightmare before christmas'.


In the 80’s Japanese anime became a massive hit in the western area. The inspiration for animation became massive in japan resulting in their art to become better and better which led to great animations like ‘Akira’, ‘Spirited Away’ and ‘Dragon Ball Z’ which is still a big hit today, although it started in 1989. Japanese animation was renamed to ‘Anime’ for short in the western areas. Traditional drawing requires lots of artists to create frame-by-frame pictures that will then be compiled into a movie using computer software or watched on cellotape. so it is simular to how the Kinetoscope works. The end result to this would be a video, which would possibly be much longer than a Kinetoscope and the end result is made the same way as Claymation. Examples of drawn animation that are advertised would consist of Studio Ghibli’s Spirited away and My Neighbour Totoro: 


Computer animation are state of the art modern animations that were created on a computer using 3d model engines or 2D animation using ‘blender’ or ‘Adobe Flash’. Computer animations are found to be the easiest of animations to create as any errors can easily be corrected and images can be made easily using the available tools. Video games use 3d model engines in order to create their games and in-game models, but not all games are 3d so they may need a simple image creator like ‘Flash’. Creating animation using special software of computers is a lot different than older techniques as computer animation requires the creator to place an object within a certain criteria area for each individual frame rather than just drawn on paper and spun in a circle like the zoetrope.

Computer animations are used quite frequently in different multi-media like music videos and advertisements. Computer games have lots of computerised animations in them, as they seem to keep people attracted to their products when they put them in their games and video trailers. An example of a computer generated animation is: (http://www.youtube.com/watch?v=2_0fz4WD6GE)

Designing animation storyboard & prototype
I have to create a storyboard animation design based around either 'The Magic Paintbrush' or 'Yallery Brown'. I had chosen to do 'The Magic paintbrush' as I believe that I could create something better than if I had done 'Yallery Brown'. I first had to create a story board based around the 'Magic Paintbrush' story that consisted of the main story, but had been changed to suit my style. I had been recently inspired by Toshiro Mifune and I had wanted him to become the face of the character for my animation. I take into consideration sound effects and background music that I could use for this animation, as I have chosen traditional east-asian music to give it a story effect.

Before I can start animation my verison of 'The magic paintbrush' I must first show my understanding of animation in flash. I had tried many different animation techniques in flash and have ended up with a square, which changes shape and bouncing balls using different types of animation.


My attempt at creating a walking animation.
I had found drawing the animation quite easy because I had the help of a guide, that allowed me to get a further understanding of how the human body moves. To create the animation I had to draw each individual frame of the human body and compile them into a video to create a stop motion animation. I had found it hard to get the character to stay in the same place whilst moving, but after learning onion skinning I had learnt how to see where the frames are in front and behind the frame I am editing.
Early Character Design.


In this animation I had created, I had to begin defining my character.  to do this I had to use flash and create a classic tween alongside a symbol, which has all the character animation frames inside. I had found a few things hard about creating this animation because I had to create each individual frame and find out how to use flash at the same time, which had used up a lot of time, during working on this.


I then moved on to create my own character as I had been using a model to help guide me the way on how a human may move.


This is my final walk cycle that I had created after various stages of development for my character. I am pleased with the flow of animation for this character as it is smooth and appears professional.

Facial Animation

I then moved onto trying to create basic facial animations for my characters. During this point I did not know about how to create moving facial animation, so I had to do some research.  First I had to do some research on different techniques for creating facial animations. I first had looked at Alphonso Dunn's video on Flash animation tutorials.
                                                              (Alphonso Dunn's Video)

Screenshot of Alphonso Dunn's work
Looking at Alphonso Dunn's work allowed me to get an understanding into how symbols and facial features worked within a animation.


My attempt at trying the technique.
I had then attempted to re-create Alphonso Dunn's work so that I would be able to use these techniques in the future when I am working of facial features within animation projects.


2nd Screenshot of Alphonso Dunn's
 Work
I then looked at how to create different emotions within the same symbol and how to change frames to show certain facial features.


Final design attempt


Bone tool Animation

In today's lesson I had began learning how to use the bone tool. I had first started with creating a single leg, which I had found very hard to create. With the help of knowflash's video " FlashLearner.com - animation made easy with the bone tool." I had begun to understand how to use the bone tool.


First attempt at using the bone tool.


Second attempt at using the bone tool along with animation.

Smart targets 18/11/2014
1. By the end of this session I hope to achieve to create at least 30-40 seconds of animation done.
2. By the end of this session I hope to have a fully animated walk cycle for my main character finished.
3. By the end of this session I hope to have at least 3 scenes completed.
Unfortunately I had failed these smart targets, which means that these targets were not reliable and so I had spent more time during my free time to make sure that I can complete more of my animation.

Failed attempt at creating a smooth animated character

Whilst working on the magic paintbrush I had tried different techniques and when I had tried to create a frame by frame animation I had found it to be not as smooth as I wanted it to be, so I had moved onto another technique that requires me to create symbols and move them using classic tweens.
Interim Evaluation
Today is the review date for the animation that I have created. This means that I have failed to create a 2 minute animation before the review date. In doing so, I must review what I need to do to improve my work. I had not been able to get sounds for my animation in time for the review date, meaning that  I would need to work on this if I wish to improve the animation.
After my animation was reviewed I had agreed with needing to finish my animation as that would realise my goal to a successful animation video. Scott has said "The movement is smooth and I can see where you are going with it" which means that my current animation is understandable to a viewer and that the animation is smooth to a profesional standard. In order for my to improve my animation I must think of 3 different targets that I must reach within the 2 week period.

1: Successfully implement sound into the entire animation with accurate representation to what the sounds are used for.
2: To be able to finish my 2 minute animation on time before the 2 week deadline.
3: Have my finished animation to be reviewed in order to see if I have realised my intentions.

27/11/2014
I had spent the entire week working on my animation to make sure that I would have it finished by my dead line date and I have managed to achieve that. This version of 'The Magic Paintbrush' has gone a long way since the interim deadline as I have managed to fully implement it with sound effects with music, I have also managed to get it to 2 minutes long. I have managed to reach two of my smart targets before the final deadline, I now have to await for it to be marked next week in order to see what improvements I could make to it if I need to.

I really like this version of of my 'The Magic Paintbrush' as I had learnt so many new techniques along the way, and it shows throughout the video. When I first started this project I only knew how to move charaters frame by frame, whilst in lessons I was shown the bone tool, which I had found useful but it also came with problems that may arise, such as broken or glitchy character. I then learnt how to animate characters by creating parts of the character into symbols and then using classic tweens inside the main symbol to show a fluid animated character.


I then had my final animation reviewed by a student in my class to give me a good idea on where I could improve on in the future. It is clear from the comment that the animation in my characters arms where not as smooth as I thought, as Rui had found the arms to appear "Rigged". For me to improve my animation I would need to revisit my characters and have another go at animating the arms. it may also be best for me to do some research into how arms move within animation that are currently our there and possibly compare mine to other work to improve the work overall.

If I were to do this project again I would take more time into the animation side of things and possibly do some research before hand to ensure that my animation would be fluid. I would also spend more time on the animation, as for when I worked on this one I had spent most of my time working on the animation nearing the deadline rather than earlier on. Apart from my flaws in this animation I am pleased with how it came out overall as it appeared to get positive feedback from both reviewers. I had found creating the characters enjoyable and exciting, as it was something new for me to try out different techniques that I had not known before hand.

After assignment evaluation

After handing in my animation on deadline date I have found some very interesting feedback that I could learn things from. Firstly, I had found that a easter egg I had left within the animation was actually holding my work back from being as good, as it did not fit the style of my animation, on which I did not notice myself until people had said so. This had allowed me to have some time to go back to the animation if I chose to and edit it even more. Apart from that, I have had some overall positive feedback that had said that the animation was enjoyed by the class and had followed a traditional style.