The earliest known animation predates backs to caveman era of humans where it is believed that art created by caveman tried drawing multiple sets of legs or different proportions from what animals would be, this was a way cavemen showed motion in their images. Although it is hard to find information on prehistoric animation because it has possibly been poorly preserved by men of those time, there have also been references of animation happening across the world like the Chinese dynasty era, Ancient Egypt and even Leonard da vinci as well. [The Art of Animation, Bob Thomas]
[http://www.dailymail.co.uk/sciencetech/article-2207596/A-night-pictures-caveman-style-Prehistoric-artists-used-cartoon-like-techniques-make-paintings-move.html]

 Animation has always been an
aspiration of humans and had become easily crafted as the Zoetrope was created
in 1833, it is mentioned in Science and Civilization in china: volume 4 that
something was created similar to that of the Zoetrope to display animation in
180AD. The Zoetrope was a device that required you to look through the eye
slits as it spins round to give you the illusion that the images on the inside
are actually moving.
Animation has always been an
aspiration of humans and had become easily crafted as the Zoetrope was created
in 1833, it is mentioned in Science and Civilization in china: volume 4 that
something was created similar to that of the Zoetrope to display animation in
180AD. The Zoetrope was a device that required you to look through the eye
slits as it spins round to give you the illusion that the images on the inside
are actually moving.
[http://upload.wikimedia.org/wikipedia/commons/9/99/Zoetrope.jpg]
A thaumatrope was a animation method created in the 19th century, which used a circular plate with 2 different images on, 1 on each side. This method uses elastic bands to spin the plate at a fast speeds to give off the illusion of movement. A very well know thaumatrope is one with a cage in one side and a parrot on the other, which gives the illusion that the parrot is in the cage. [http://upload.wikimedia.org/wikipedia/commons/9/9f/Taumatropio_fiori_e_vaso%2C_1825.gif]
A thaumatrope was a animation method created in the 19th century, which used a circular plate with 2 different images on, 1 on each side. This method uses elastic bands to spin the plate at a fast speeds to give off the illusion of movement. A very well know thaumatrope is one with a cage in one side and a parrot on the other, which gives the illusion that the parrot is in the cage. [http://upload.wikimedia.org/wikipedia/commons/9/9f/Taumatropio_fiori_e_vaso%2C_1825.gif]
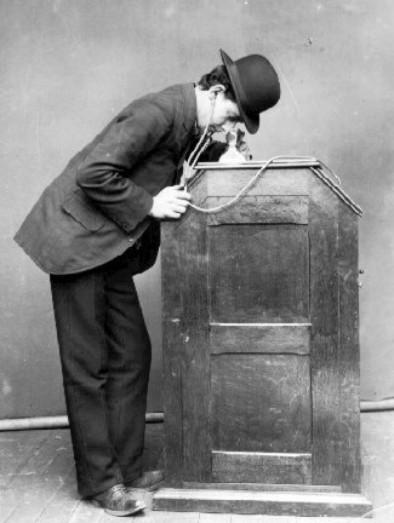
The Zoetrope’s successor, the Kinetoscope, which was made in 1888, became an early and extremely famous movie box, which displayed animation
through the same illusion of a zoetrope except the images shown would be on a
pieces of film and run at a pace that passed along the eye hole, which when
watched would show the illusion of a moving images. The Kinetoscope used the
same functions for showing films before video was created. I believe that this
form of illusion of animation is much better than the zoetrope as it does not
require anyone to move the object in order to see the animation, the only
downside to this is that the Kinetoscope’s are big boxes that take up a lot of
space compared to todays ways of storing animations on a DVD.

A flick book is a series of images that are drawn on a series of pieces of
paper, which change slightly between each image and then the user has to switch
between each image by holding one end of the paper and flicking between each
individual piece at a certain speed to maintain the illusion of a moving image.
An example of this can be found: (http://www.youtube.com/watch?v=7g9ykrhFVq8). The
flick books are easier to carry and are portable unlike the zoetrope, due to it being made out of paper it can be made to any size.

Clay animation is where pictures are taken of a clay model that moves
in each individual picture and when it is put together it creates an animation,
which would show the clay animation moving by itself. Stop-Motion animation is the most common type
of animation, which is the heading group of Claymation, as it is used in films
like ‘Chicken run’ and ‘Wallace and Gromit’, which heavily influence a lot of
people. Stop-Motion animation has lots of individual genres inside of itself
that go from clay animation to drawn animation.
 [http://images2.fanpop.com/images/photos/4400000/Corpse-Bride-making-the-film-corpse-bride-4429691-450-305.jpg]
Stop-motion animation is a technique that allows the create to take several images of an object that moves in a direction, when all of the pictures are compiled into a movie, it gives of the illusion that the object is actually moving. Famous stop motion animations include 'The corpse bride' and 'The nightmare before christmas'.
Stop-motion animation is a technique that allows the create to take several images of an object that moves in a direction, when all of the pictures are compiled into a movie, it gives of the illusion that the object is actually moving. Famous stop motion animations include 'The corpse bride' and 'The nightmare before christmas'.
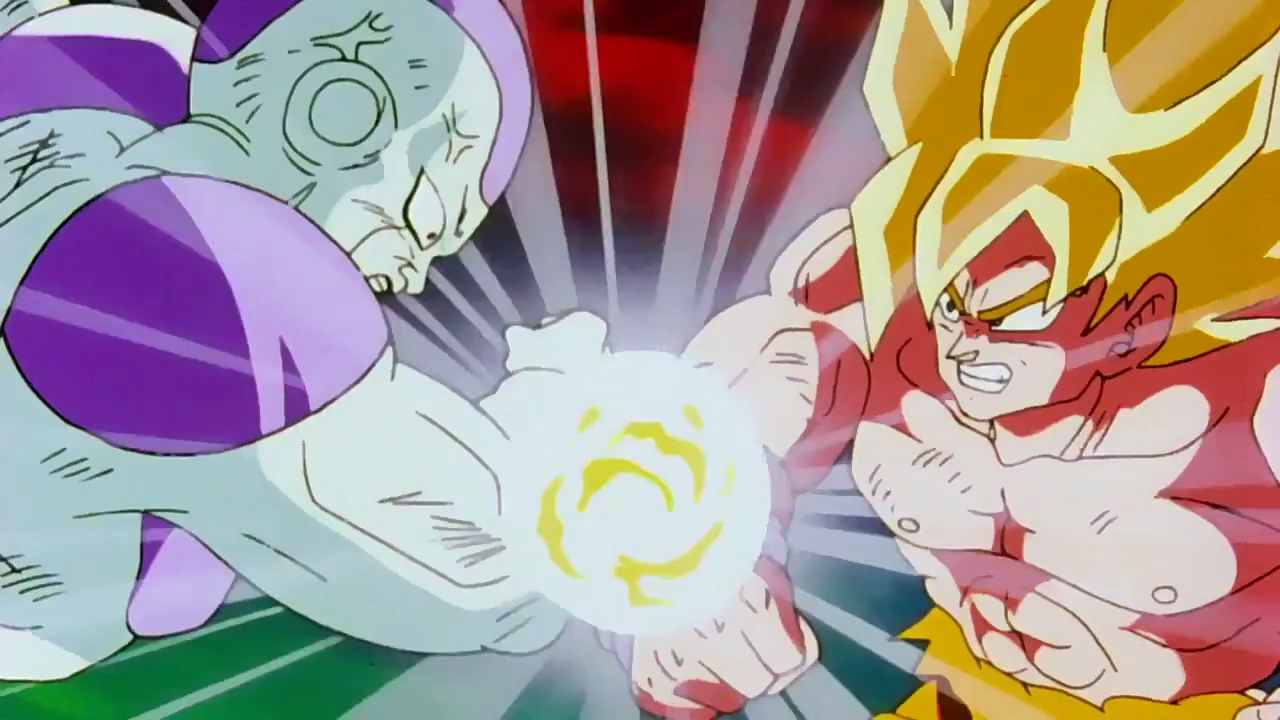
In
the 80’s Japanese anime became a massive hit in the western area. The
inspiration for animation became massive in japan resulting in their art to
become better and better which led to great animations like ‘Akira’, ‘Spirited
Away’ and ‘Dragon Ball Z’ which is still a big hit today, although it started
in 1989. Japanese animation was renamed to ‘Anime’ for short in the western
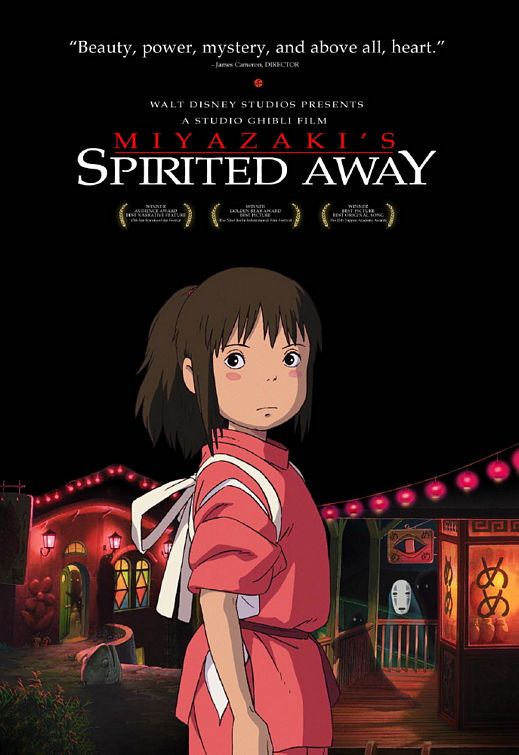
areas. Traditional drawing requires lots of artists to create frame-by-frame
pictures that will then be compiled into a movie using computer software or watched on cellotape. so it is simular to how the Kinetoscope works. The end result to this would be a video, which would possibly be much longer than a Kinetoscope and the end
result is made the same way as Claymation. Examples of drawn animation that are
advertised would consist of Studio Ghibli’s Spirited away and My Neighbour
Totoro:

Computer animation are state of the art modern animations that were created on a computer using
3d model engines or 2D animation using ‘blender’ or ‘Adobe Flash’. Computer
animations are found to be the easiest of animations to create as any errors
can easily be corrected and images can be made easily using the available
tools. Video games use 3d model engines in order to create their games and
in-game models, but not all games are 3d so they may need a simple image
creator like ‘Flash’. Creating animation using special software of computers is
a lot different than older techniques as computer animation requires the
creator to place an object within a certain criteria area for each individual frame
rather than just drawn on paper and spun in a circle like the zoetrope.
Computer animations are used quite frequently in different multi-media
like music videos and advertisements. Computer games have lots of computerised
animations in them, as they seem to keep people attracted to their products
when they put them in their games and video trailers. An example of a computer
generated animation is: (http://www.youtube.com/watch?v=2_0fz4WD6GE)
Designing animation storyboard & prototype
I have to create a storyboard animation design based around either 'The Magic Paintbrush' or 'Yallery Brown'. I had chosen to do 'The Magic paintbrush' as I believe that I could create something better than if I had done 'Yallery Brown'. I first had to create a story board based around the 'Magic Paintbrush' story that consisted of the main story, but had been changed to suit my style. I had been recently inspired by Toshiro Mifune and I had wanted him to become the face of the character for my animation. I take into consideration sound effects and background music that I could use for this animation, as I have chosen traditional east-asian music to give it a story effect.

Before I can start animation my verison of 'The magic paintbrush' I must first show my understanding of animation in flash. I had tried many different animation techniques in flash and have ended up with a square, which changes shape and bouncing balls using different types of animation.
 |
| My attempt at creating a walking animation. |
I had found drawing the animation quite easy because I had the help of a guide, that allowed me to get a further understanding of how the human body moves. To create the animation I had to draw each individual frame of the human body and compile them into a video to create a stop motion animation. I had found it hard to get the character to stay in the same place whilst moving, but after learning onion skinning I had learnt how to see where the frames are in front and behind the frame I am editing.
 |
| Early Character Design. |
In this animation I had created, I had to begin defining my character. to do this I had to use flash and create a classic tween alongside a symbol, which has all the character animation frames inside. I had found a few things hard about creating this animation because I had to create each individual frame and find out how to use flash at the same time, which had used up a lot of time, during working on this.
I then moved on to create my own character as I had been using a model to help guide me the way on how a human may move.
This is my final walk cycle that I had created after various stages of development for my character. I am pleased with the flow of animation for this character as it is smooth and appears professional.
Facial Animation
I then moved onto trying to create basic facial animations for my characters. During this point I did not know about how to create moving facial animation, so I had to do some research. First I had to do some research on different techniques for creating facial animations. I first had looked at Alphonso Dunn's video on Flash animation tutorials.
 |
| Screenshot of Alphonso Dunn's work |
 |
| My attempt at trying the technique. |
 |
| 2nd Screenshot of Alphonso Dunn's Work |
 |
| Final design attempt |
Bone tool Animation
In today's lesson I had began learning how to use the bone tool. I had first started with creating a single leg, which I had found very hard to create. With the help of knowflash's video " FlashLearner.com - animation made easy with the bone tool." I had begun to understand how to use the bone tool.
 |
| First attempt at using the bone tool. |
 |
| Second attempt at using the bone tool along with animation. |
Smart targets 18/11/2014
1. By the end of this session I hope to achieve to create at least 30-40 seconds of animation done.
2. By the end of this session I hope to have a fully animated walk cycle for my main character finished.
3. By the end of this session I hope to have at least 3 scenes completed.
2. By the end of this session I hope to have a fully animated walk cycle for my main character finished.
3. By the end of this session I hope to have at least 3 scenes completed.
Unfortunately I had failed these smart targets, which means that these targets were not reliable and so I had spent more time during my free time to make sure that I can complete more of my animation.
 |
| Failed attempt at creating a smooth animated character |
Whilst working on the magic paintbrush I had tried different techniques and when I had tried to create a frame by frame animation I had found it to be not as smooth as I wanted it to be, so I had moved onto another technique that requires me to create symbols and move them using classic tweens.
Interim Evaluation
Today is the review date for the animation that I have created. This means that I have failed to create a 2 minute animation before the review date. In doing so, I must review what I need to do to improve my work. I had not been able to get sounds for my animation in time for the review date, meaning that I would need to work on this if I wish to improve the animation.

After my animation was reviewed I had agreed with needing to finish my animation as that would realise my goal to a successful animation video. Scott has said "The movement is smooth and I can see where you are going with it" which means that my current animation is understandable to a viewer and that the animation is smooth to a profesional standard. In order for my to improve my animation I must think of 3 different targets that I must reach within the 2 week period.
1: Successfully implement sound into the entire animation with accurate representation to what the sounds are used for.
2: To be able to finish my 2 minute animation on time before the 2 week deadline.
3: Have my finished animation to be reviewed in order to see if I have realised my intentions.
27/11/2014
I had spent the entire week working on my animation to make sure that I would have it finished by my dead line date and I have managed to achieve that. This version of 'The Magic Paintbrush' has gone a long way since the interim deadline as I have managed to fully implement it with sound effects with music, I have also managed to get it to 2 minutes long. I have managed to reach two of my smart targets before the final deadline, I now have to await for it to be marked next week in order to see what improvements I could make to it if I need to.
I really like this version of of my 'The Magic Paintbrush' as I had learnt so many new techniques along the way, and it shows throughout the video. When I first started this project I only knew how to move charaters frame by frame, whilst in lessons I was shown the bone tool, which I had found useful but it also came with problems that may arise, such as broken or glitchy character. I then learnt how to animate characters by creating parts of the character into symbols and then using classic tweens inside the main symbol to show a fluid animated character.

I then had my final animation reviewed by a student in my class to give me a good idea on where I could improve on in the future. It is clear from the comment that the animation in my characters arms where not as smooth as I thought, as Rui had found the arms to appear "Rigged". For me to improve my animation I would need to revisit my characters and have another go at animating the arms. it may also be best for me to do some research into how arms move within animation that are currently our there and possibly compare mine to other work to improve the work overall.
If I were to do this project again I would take more time into the animation side of things and possibly do some research before hand to ensure that my animation would be fluid. I would also spend more time on the animation, as for when I worked on this one I had spent most of my time working on the animation nearing the deadline rather than earlier on. Apart from my flaws in this animation I am pleased with how it came out overall as it appeared to get positive feedback from both reviewers. I had found creating the characters enjoyable and exciting, as it was something new for me to try out different techniques that I had not known before hand.
After assignment evaluation

After handing in my animation on deadline date I have found some very interesting feedback that I could learn things from. Firstly, I had found that a easter egg I had left within the animation was actually holding my work back from being as good, as it did not fit the style of my animation, on which I did not notice myself until people had said so. This had allowed me to have some time to go back to the animation if I chose to and edit it even more. Apart from that, I have had some overall positive feedback that had said that the animation was enjoyed by the class and had followed a traditional style.
No comments:
Post a Comment