Introduction into Unity 3D
Unity Engine is a Program for games production and design, it was created in 2005 and has heavily been developed from there to the point of where everyone with the potential to create games are allowed to with their freeware version of Unity Engine. Unity Engine has become very popular in the past few years but has had competition with rivals such as, Unreal Engine for developers on the market. Unity has various tools within it's engine to give you the freedom of creating a game any way you feel like, as so long you know how to do it. I will be spending the next few weeks working on my skills within unity to get knowledge and the ability to create interactive games that would benefit me in the future.
Understanding into Unity 2D Design
After creating a 3D game I was given the task of creating another game from a tutorial online, but this time it would be on a 2D platform (https://unity3d.com/learn/tutorials/modules/beginner/live-training-archive/creating-a-basic-platformer-game?playlist=17219). My previous knowledge, when learning the roller ball game, should help me toward understanding this tutorial.

I only needed several items from the list of imports, such as, characters, animation, effects and materials. This will allow me to use pre-made models in order to learn how to code for a 2D platform.

I began by dragging the prefab of the character onto the scene for me to see how it appears on screen and make some changes to it before coding it's movements and creating a environment for it to walk around on.


 The 'M Shed' close to the Bristol harbourside has a museum on the history of Bristol and it's ports. I had taken this trip to my advantage by collecting images of possible boats that I could create in cinema 4D. I have an idea for the player to use a boat to transport himself around the area to collect items.

I began by starting to import 2D files from the asset store in order to have characters readily available to use in order to learn 2D Unity.

I only needed several items from the list of imports, such as, characters, animation, effects and materials. This will allow me to use pre-made models in order to learn how to code for a 2D platform.

I began by dragging the prefab of the character onto the scene for me to see how it appears on screen and make some changes to it before coding it's movements and creating a environment for it to walk around on.

I began coding the character in order to let the user move him. Whilst following the tutorial I learned how Vector2 and Vector 3 affect the speed of users moving object or the player in this case. I had also learnt about flipping the character's sprite during movement as well.

During coding I had run into a few errors concerning my punctuation within coding. It had took me a very long time to figure out that I had simply missed out a capital letter on a word and that the coding software did not see it as a fault because what I had written still worked in theory but did not work within the Unity engine.

Afterwards more errors started appearing, I had come to realise that I had spelt rb2d wrong and had quickly changed it.
Below is a test of the character moving around on a platform to see if it can move effectively with no bugs or glitches. After testing the character, it appeared to have no faults so I watched more of the tutorial to learn more.
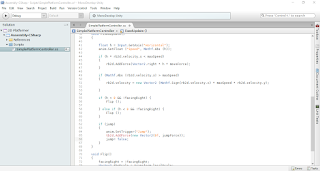
This picture below is a working of code to spawn platforms in front of the character you can see on the image that I had create several "Public Float" in order to edit certain aspects of the spawning of platforms, these float variables are editable in the unity engine as they have been coded to be "Public".

The video below shows the spawning of platforms, which appear because of the coding I had put in place.
At this point I had created a prefab of a coin that triggers an event when the player interacts with them. This event is the destruction of the coins in order to make them look like they were picked up by the character.
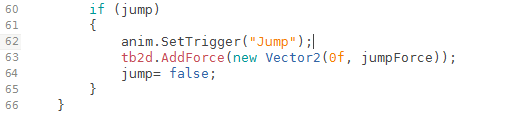
After fixing bugs, such as the random jump that happens when the game starts I had finalised the game for use on Microsoft devices. This video is a preview of what it would look like if you download the game.
Bristol harbour side project
For this proposal I am tasked with creating both a 2D and a 3D game within unity, but before I could do I must first understand what I need to do. For my proposal I am tasked with creating a game based around the bristol harbourside, so I began taking photos all around the bristol harbourside to get an idea of what the area should look like.


Research stage
Before I can create a proposal to display my ideas, I must first show my research, knowledge and understanding into different 2D and 3D games engines that are used today by professional and indie games developers alike. Many different engines work differently depending on how they are created within C++ Coding and it is up to the developer of that engine to decide how complex or easy the user interface is for the consumer of that engine. The term engine defines from that of a car, cars require an engine to run, per say so do video games require something like 'Unity' for example, for it understand the code that it is being told to run.
I will begin with the 'Scratch' engine, which is the beginning footsteps for any "want to be" programmer or games designer, as it's simplistic set up allows for the user to simply drag and drop functions onto the program window to where it can be put together like a jigsaw puzzle. As a free program, scratch allows anyone to learn and gain an understanding into programming within a 2D environment.

(https://llk.media.mit.edu/files/content/projects/scratch-editor.png)
Scratch is split up into 4 panels; The game visual display, Sprites, Functions and the programming. With tutoring it is very possible for children to pick up the techniques that this software has to offer. This will allow them to have a greater advantage at learning more complex code further on. I myself have used Scratch in the past and have found it to be a successful piece of software to create 2D games, but it itself has limitations to what it can create. For example it is only limited to 2 dimensional games and cannot create 3D environments.
Another example of a 2D engine is 'Adobe Flash'. Flash was created by Adobe as a software that could potentially create professional animations and interactive games/animations. Flash was considered a major input towards website design for the flashiest of websites, but for the past 5 years(2010-2015) has been in decline seeing up to less than 10% usage on all websites [http://w3techs.com/technologies/details/cp-flash/all/all].

(https://blogger.googleusercontent.com/img/b/R29vZ2xl/AVvXsEgxBEh3MywxY37cVunkAti2lJujMMZ8Z1gps3vF9kOZcy5dO4ssT_r5HZuvaBNfIjyMmXKyTBFaX4cxvOAApboX7hpcZHgxNmImwbc1X7SUZjGn8Uu4V__rlTIxwc7TqElmTRfCdD69pqdn/s1600/interface.png)
Adobe Flash Professional is another starting point to allow user to create animation from the art side of things rather than Scratch's technical side. Users are given the choice of several different projects to start on, the most popular one being actionscript, as the is the most efficient was to create animations within the program. First users can use the tools on the right side to draw out there characters, scenery and anything their mind could think of in different frames. This program was designed for the artist in mind for when creating animations. After the art is finished the user can then create a frame by frame animation or use the programs tools like "Motion tween" in order to get a smooth and precise movement in their animation. I have used Adobe Flash Professional a lot in the past and I have to say that it is one of the most useful techniques/program to pick up and learn as it get's you into the mind frame of learning how animation works because of the way it is layed out in front of you. The only setback towards this software is that it is becoming a dying product in the use of flash plugin, but can still be useful to create movies/animations.
Unity was created in 2005, with unity 5 being created in 2014, by a company called 'Unity Technologies' [https://unity3d.com/public-relations]. Unity is one of the largest Free use software for beginners or anyone in the world to learn and recently had it's system reworked to allow users to get the full experience of Unity. Unity is a 2D and 3D platform that allows people to use their own models, materials and sounds within a chosen environment and then craft a game out of them. The engine has been used by a bunch of top end companies, who create games such as: Kerbal Space program, Cities Skylines and Lara Croft: Relic Run[https://unity3d.com/public-relations].

(https://unity3d.com/sites/default/files/styles/original/public/speedtree.jpg?itok=CpoIRrrt)
Unity allows the user to create a project whether in 2D or 3D and then brings them to an interface with 2 screens that show a blank world to where the user has the ability to create a world out of cube or possibly import one through the use of other programs. From there on users can create scripts using C# or Javascript as the code's language to allow the to create effects and functions within their game. This allows the program to be very useful to new comers of programming and video games design as it is the stepping stone to professional video games design, as said before, big companies that have worked on "Kerbal space program" have used this software to help them create the game. I have not used Unity before, but it seems that it would be a great use towards my knowledge within the professional games design.
The Source engine was developed and created by Valve Corporation in 2004 and was fairly useful to those who purchase Valve games, as they could use each games engine as a base for development. Among the program, users had the choice of using: Hammer Editor; a Map development kit, Model Viewer; allows you to view game models and Face poser; which allowed you to model animations within a characters face and also to create animations with pre-existing characters.

(https://upload.wikimedia.org/wikipedia/en/thumb/7/7b/Source_SDK_Launcher.jpg/220px-Source_SDK_Launcher.jpg)
Valve Source Hammer Editor works a lot like Unity in the sense of development within a 3D world. In the Hammer editor you would use the tools shown at the top of the program to create and edit the world around you. The program is split up into 4 panels, each one being different, by default the top left panel would display you level in a textured pre rendered views, as for the other panels they would show the map in wire frame from top, left and front views to allow you to see the layout.

(https://upload.wikimedia.org/wikipedia/en/8/8b/Valve_hammer_editor.jpg)
Source Hammer Editor is effective to learn for newcomers around who own valve games. The only set back towards this is that you cannot release these maps onto the market as the only programs that can run the program's levels where valve source games like Half Life, Counter Strike or popular third party games, such as Garry's mod.
Below is an image of a level I worked on in 2008 at the age of 12 when I was working on my skills to become a games designer (https://facepunch.com/showthread.php?t=649008). I used Valve Source editor to create this level, it allowed me to learn important skills, such as obstacles, enemies, objective and how things work within a video game from a design point of view.

(Thread showing that I'm logged in the top right corner.)

(http://i76.servimg.com/u/f76/12/46/47/11/mgs1_e15.jpg)
Unreal engine was developed in 1998 and has gone through several development versions to the point of UDK, which was released in 2008 and was made free for use to the public, it was recently updated on 11th November 2015. Unlike Unity Unreal has it's code language as C++ instead of C# or Javascript, so that means that the style of programming is different.

(https://lh5.googleusercontent.com/GwNAsfrjiCZ4su19edhkP-aAO6MmTgrTe8ReeYOx_zjv1OpRwkXprTDmYlZ5Yu8GHSbO8bo_WrG4g0uIJy6w0MvwD_5RopBm7gXYKvHJwd8T3o97GW5iwPo3WEsT4VIW7Q)
Unreal is one of the many top of the range engine that allow anyone to master because of it being freeware. This allows any small indie developers/Small groups of people to gain experience from professional tools that are used in industry and allows for progression in knowledge. Unreal is very similar in structure of components and visual style as to the Unity engine. This engine also has a asset store to help it's community to grow and learn new things whenever they need it. By using the tools given in the Unreal engine the user can create and edit: terrain, objects and effects within a 3D or 2D environment. This allows the creator to make a world he sees fit to his game. This would be very interesting and also extremely useful for me to learn as it is a top end quality engine and it's use of shaders makes me really interested in wanting to create my own games on such an engine.
Above is a video on what Unreal Engine has to offer for those who wish to learn.
Proposal
Working title: BHarbourside Adventure
Target market: I propose that my target market will be between the ages of 13-18, as my game requires players to adventure out into the open in order to complete the game. I don't believe it would be suitable for a younger audience, as the may not understand how to play it or may have a lack of interest within the subject of the game.
What you will work towards producing: I am working on producing a 3D games with 2D elements within the game. I believe I could achieve this by having small 2D elements within the 3D world, say mini-games for example.
Influences, starting points and contextual references: Early influences include; Assassin's creed: Black Flag, as that was a successful boat action game. Generic adventure games, the average adventure games require the player to collect points that usually float above the floor.
(Assassins creed Black Flag Ship Battles)
These games serve a basis on where the character explores their environment in order to achieve the goal of the game. This type of goal is the same idea I want to be able to put into my own design.
Early ideas research and sources: Early ideas include a game where you can walk down the sides of bristol harbourside, but there will be several blocked off areas that you cannot traverse so that the only way to get around is by finding a boat in the dock and travel across the dock. I propose to do this by creating scenery within unity and creating a boat model within Cinema 4D. This will take some time however so I cannot spend too much time on detail, I need to focus more on how the game will run overall.
I had found this video and it is essentially what I want my boat game to feel like when you are moving about on the boat
(https://www.youtube.com/watch?v=LlS5kYyqAis)
Here's another example of what I would want to achieve with the water realism and to be able to have a boat with realistic movement
(https://www.youtube.com/watch?v=NyFUJLIVa-A)
I had found this buoyancy tool kit which is essentially what I would like to use for my proposed idea, but I could not afford to pay for this, so I will need to look for an alternative.
(http://gustavolsson.squarespace.com/buoyancy-toolkit/)
(https://www.assetstore.unity3d.com/en/#!/content/181)
Intended techniques, non digital and digital processes:
Timescales:
21/10/15 - Research the area of Bristol harbour side for some ideas.
28/10/15 - Finish Proposal and begin design cycle for idea.
05/11/15 - Begin designing the game within Unity.
11/11/15 - Continue on with the development of the game.
18/11/15 - Develop game further nearing final outcome.
25/11/15 - Build the game into a product and prepare for evaluation.
Proposed methods of evaluation: I plan to have my game evaluated by having it shown in front of the class on display and then having multiple people try it out for themselves and then they give me feedback on what they believe I could do to improve it if I had time in the future.
Ideas Generation
Idea 1: Adventure game the allows the player to travel across Bristol Harbourside and challenges them to explore and collect keys (Possibly hidden in chest that you need to lockpick in a 2D format?). In order to explore Bristol harbour side the player must use a boat in order to travel to some of these areas.
Idea 2: A boat game that requires the player to travel around the water area of the bristol harbourside and go through checkpoints in order to gain score which would be added up at the end of the level. For the 2D aspect the player would have to do another lap, but in 2D overhead mode?
Design
I began designing the layout for the Bristol harbour side using both unity and Cinema 4D models. Below is the progress I have made so far creating barriers that stop the player from jumping of the sides of the bridge

I started crafting the box that was going to be used to make the transistion between 3D to 2D. In this photo, the box has a skeleton rigged to it, which I had wanted to work on and create animations to where the box opens but had found that it did not animate well and had to scrap animations for the box.

I began progress on the outer areas within the Bristol Harbour side. Here you can see the other side of the canal and the other lane that is similar to how it looks in real life. I shall give the player the ability to sail a boat down the canal and explore.

At this point I thought that the map was mostly done, but had lacked an objective or score system at this point, so I created my own coins that the player can pick up and will go towards his score.

This image shows a building that I began creating for the scenery the the player can look at. These buildings are meant to be non accessible and only there to allow the player to look at. I created these to make the game look like it is filled up more than rather if it was empty.

I had ran into a problem to where the buildings would looks like poorly vacuumed plastic and had to look online for a way to fix this problem. By this point as well I had began test UI elements to discover what I could do on screen.

I had found this post on a forum, which had explained that I needed to change the settings of the Model within the Unity program

As seen below, it has solved my problem and no longer looks like plastic or low detailed.

I then began working on other buildings to add to the background.

I wanted my coins to spin on their placement point, so I had decided to look through the unity manual and online guides to see how I could make it work. Below is the code I had used to make the spin. The "Transform.Rotate" allows me to rotate an object in the form of code. This will not work on it's own though, it require further instructions, such as a vector. A vector is a single number based up upon the 3 direction within the 3D world (X, Y and Z). The number that comes out of it is then times by "Delta time" which is a function that makes your frame rate independent meaning that the object will move per a second rather than per frame.

I then made a sprite for my UI so that the player would know what to collect as his score, but to also to make the UI look more stylish.

This video below shows what my code does when you walk into the coins and what effect it has on the UI.
I then added sound to the coins that I created in audacity. They activate when you pick the coins up.
I began working on some sort of puzzle area that the player has to work out how to get past in order to progress the map.

I decided to create a small island in the middle of the harbour side canal, so that I had a location for where I could put the box.

After fiddling with the terrain options and began learning about what it could do I starting creating smaller islands nearby to make it seem less out of place.

From this point I attempted to create a boat model within Cinema 4D. I created a long rectangle with a high poly count.

I began using the 'Melt' tool on the bottom of the boat to create the beveled effect on the bottom of the square.

This created strange effects with testing with the 'Melt' tool and required several trial and error attempts in order to get the shape I want.

I finally managed to get the boat to curve inward in the front, just like a real boat, but it had left an excess point at the front which I needed to cut off.

The overall feeling towards this boat had made me feel that it did not meet to my expectations so I had put the boat model to the side and started again.

This time I tried to use the points within the square to create the curved bottom of the boat and it had come out quite successful.

I began raising the front of the boat onto where it would meet at a point, but had found that because I had made the segments number too high that it would start to glitch into itself and produce a mess of a model, so I had decided to keep it flat.

I then worked on the inner part of the boat using the knife tool to create a border. I could of done the same by using the 'Extrude Inner' tool but had chosen not to, although it could have been more effective.

I then tested the boat in game and had found it to have worked well within the atmosphere.

After finishing my 3D level I began working on my 2D level that you go to after you find the treasure in the first level. I bagan working on making sure my player object does not fall through the floor by creating a box collider on the floor and a rigid body on the character. This character was a place holder for the boat whilst I practised with the 2D elements.

I then created a terrain in the background after learning a lot about it in my 3D level. I had decided to make this to assist the player in understanding how far he has progress throughout the level.

Afterwards I tested the boat with the currently made level and had found that it would fall off the platform as it was not long enough so I had to make it bigger.

I then inported some assets that come with Unity for character control within a 2D world.

By changing the size of the view on the camera, the player is able to see a lot more in the view mode. This should make the game easier and more clearer for the player to progress.

Here is the code for the players movement around the map, which I later scrapped as I had found it quite buggy. I used a movement script that I had used in a previous 2D game, but had edited it slightly to make it work effectively in my game.

I felt that the current scene was lacking any difference in scenery I used the railings from the 3D level to bring some relevance from the past level.

I began working on the UI after creating most of my level to ensure that the code would work properly before I finish everything.

When I began creating my UI for the next level I ran into some major problems,which broke the entirety of the score collection system. I had spent a considerable amount of time looking for a solution, so I had made a forum post to ask for help with my unique problem. The webpage can be viewed here: http://answers.unity3d.com/questions/1104264/how-can-i-update-ui-text-score-using-playerprefsge.html

After several attempts to get my code working before anyone could answer I had figured out what caused my code not to work. I had made a simple mistake of not checking the keys "HasKey" so it was looking for a key that never existed.

After fixing the UI coding problem I began working on platforms and obstacles within the level.

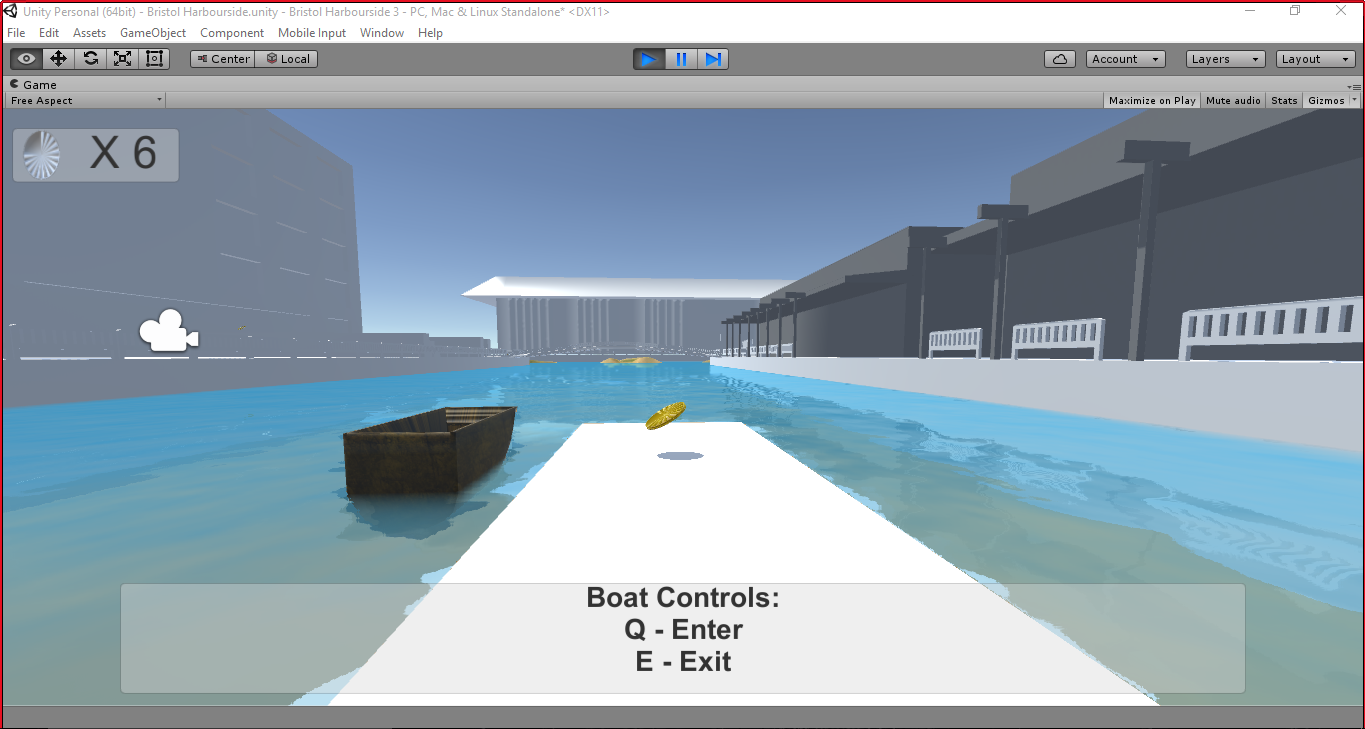
After finishing my level I went back to my first level to polish up on anything that I thought required changes, such as below, where I created an OnTriggerEnter function that would tell the player the controls for the boat when they come close to it.
Finally, I compiled my game and ran it in a build option to see how it would come out as a full build on a full resolution. I later made the cursor invisible after this video to make the game more immersive. I decided to make the 2nd level at night time to try to make the player feel like time has passed on since he has collected the treasure.
Evaluation
Today, I had shown off my game design to the class and had allowed them to test it out. I received mostly positive comments from those who played it. Some suggestions were to change the speed of the boat as it was too slow for them, another idea was for me to create textures and extra sounds for a more immersive playing experience. these ideas would be beneficial for me to acknowledge as it could improve the players experience within the game. I agree with the people who gave ideals as I too believe it would improve the overall production of the game itself.
For me, this unit has been very valuable to me, as I started the unit with no knowledge into the understanding of how Unity work or how coding in C# works either. through the process of time and queries into unsolvable problems has allowed me to use the knowledge to create the game that is shown above.